
Singer Heavy Duty 4423 Manual: A Comprehensive Guide
This manual offers a detailed guide for operating and maintaining the Singer 4423. It covers safety‚ setup‚ operation‚ troubleshooting‚ and advanced techniques‚ ensuring confident use.
With 60 accessories and capable of handling heavy-duty fabrics‚ this machine boasts 97 stitch applications and a built-in needle threader for ease of use.
The Singer Heavy Duty 4423 sewing machine is designed for both beginners and experienced sewists tackling a wide range of projects. This robust machine excels at handling heavier fabrics‚ making it ideal for tasks like denim‚ upholstery‚ and canvas‚ alongside everyday sewing needs.

This comprehensive manual serves as your guide to unlocking the full potential of your Singer 4423. It provides step-by-step instructions‚ safety guidelines‚ and troubleshooting tips to ensure a smooth and enjoyable sewing experience.
Boasting 50% more power than standard Singer machines‚ the 4423 offers increased speed and reliability. With 97 stitch applications and 60 included accessories‚ it’s a versatile tool for any sewing enthusiast. Understanding this manual will empower you to create beautiful and durable projects with confidence.
Key Features and Specifications
The Singer Heavy Duty 4423 distinguishes itself with several key features. It offers 50% more power for tackling thicker materials‚ alongside an extra-high sewing speed for efficient project completion. A standout feature is the convenient built-in needle threader‚ simplifying setup.
This machine boasts 97 stitch applications‚ providing versatility for diverse sewing needs. It includes 60 included accessories‚ expanding its capabilities. The 4423 operates at a standard noise level of 75dB under normal conditions.
Specifications include compatibility with heavy-duty thread and carpet thread. The machine is designed for reliable performance and ease of use‚ making it a valuable addition to any sewing room. It’s a dependable companion for both simple repairs and ambitious creations.
Unboxing and Initial Setup
Upon unboxing your Singer Heavy Duty 4423‚ carefully inspect all components against the included parts list. Ensure all 60 accessories are present and undamaged. Remove all packaging materials from the machine and its parts.
Begin by attaching the power cord and placing the machine on a stable‚ level surface. Familiarize yourself with the main components‚ referencing the diagrams in the manual. Before first use‚ it’s crucial to read the safety instructions thoroughly.
Wind the bobbin and insert it correctly‚ following the detailed instructions. Thread the upper thread‚ utilizing the built-in needle threader for ease. Perform a test stitch on scrap fabric to confirm proper setup and tension. Download the official PDF manual for comprehensive guidance.

Understanding the Machine Components
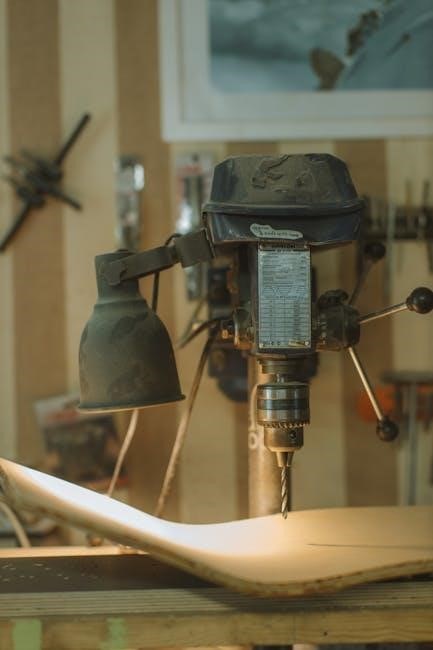
The Singer 4423 features a robust main body‚ precise needle and presser foot mechanisms‚ and an easily accessible bobbin winding system for efficient sewing.
Main Body and Housing
The Singer 4423’s main body is constructed with a heavy-duty metal frame‚ providing exceptional durability and stability during operation‚ even with thicker materials. This robust construction minimizes vibrations and ensures consistent stitch quality. The housing is designed to protect internal components while offering easy access for maintenance.
Its solid build contributes to the machine’s ability to handle demanding sewing tasks. The exterior casing is made of high-quality materials‚ resisting wear and tear. Careful attention has been given to ergonomic design‚ making the machine comfortable to use for extended periods. The overall structure supports the precise alignment of key components‚ crucial for accurate stitching. The machine’s weight also adds to its stability‚ preventing unwanted movement during use.
Needle and Presser Foot Mechanisms
The Singer 4423 features a robust needle mechanism designed for consistent and powerful needle penetration‚ even through dense fabrics. This system utilizes a high-speed motor‚ enabling efficient sewing. The presser foot mechanism provides adjustable pressure‚ accommodating various fabric types and thicknesses.
The machine’s design allows for easy needle changes‚ ensuring quick adjustments for different projects. The presser foot lever offers precise control over fabric feed‚ crucial for accurate stitching and preventing fabric slippage. Different presser feet‚ included as accessories‚ enhance versatility for specialized tasks. Proper alignment of the needle and presser foot is vital for optimal performance and preventing skipped stitches.
Bobbin Winding and Insertion
The Singer 4423 employs a top-drop bobbin system‚ simplifying winding and insertion. Begin by placing the thread spool on the spool pin and guiding the thread through the tension disc. Engage the bobbin winding mechanism by pushing the bobbin spindle to the right. Wind the bobbin evenly‚ disengaging when full.
To insert the bobbin‚ lift the needle plate cover and insert the bobbin into the bobbin case‚ ensuring the thread unwinds in the correct direction. Guide the thread through the tension spring and then up through the slot. Proper bobbin threading is crucial for consistent stitch formation. Incorrect insertion can lead to tangled threads and machine malfunction.
Thread Tension Control
Proper thread tension is vital for achieving balanced stitches on the Singer 4423. The tension dial‚ typically numbered‚ controls the upper thread’s pull. Higher numbers increase tension‚ while lower numbers decrease it. Begin with the default setting (usually ‘4’) and test stitch on scrap fabric.

If stitches appear loopy on the underside‚ increase the upper tension. Conversely‚ if the upper thread breaks or puckers the fabric‚ reduce the tension. Adjustments should be made incrementally. Different fabric types and thread weights necessitate varying tension settings. Heavy-duty thread often requires higher tension. Consistent testing ensures optimal stitch quality and prevents issues like thread breakage or uneven seams.

Operating Instructions
Begin by powering on the Singer 4423 and selecting your desired stitch. Adjust stitch length and width as needed‚ utilizing the built-in needle threader for convenience.
Powering On and Basic Operation
To begin‚ ensure the power switch‚ located on the machine’s side‚ is in the “Off” position. Connect the power cord to a grounded outlet. Then‚ switch the power on. The foot pedal controls the sewing speed; gentle pressure initiates slow sewing‚ while increased pressure increases speed.
Always raise the presser foot before threading the machine and starting to sew. This disengages the tension discs‚ allowing proper thread flow. Lower the presser foot after threading and before beginning your project. The handwheel allows for manual control of the needle‚ useful for precise positioning or intricate work. Remember to always follow basic safety precautions when operating any electrical appliance‚ as outlined in the full instruction manual.
Familiarize yourself with the reverse lever for backstitching and securing seams. Practice on scrap fabric to get comfortable with the machine’s operation before starting your actual project.
Stitch Selection Guide
The Singer 4423 offers 97 stitch applications‚ selected via the stitch dial on the front of the machine. The dial features a comprehensive range‚ including straight stitches‚ zigzag stitches‚ decorative stitches‚ and buttonhole stitches. Refer to the stitch guide chart printed on the machine itself for visual representations of each stitch and its corresponding dial number.
For basic seams‚ utilize the straight stitch setting. Zigzag stitches are ideal for finishing raw edges and creating stretchable seams. Decorative stitches add embellishment to projects. The manual provides detailed instructions for setting up and executing buttonholes‚ ensuring professional-looking results.
Experiment with different stitch lengths and widths to achieve desired effects. Always test stitches on scrap fabric before sewing your final project. Understanding the stitch selection process unlocks the full potential of your Singer 4423.
Adjusting Stitch Length and Width
The Singer 4423 allows precise control over stitch length and width using dedicated dials located on the machine’s head. The stitch length dial‚ typically marked with numbers‚ determines the distance between each stitch. Lower numbers create shorter stitches for delicate fabrics‚ while higher numbers produce longer stitches for heavier materials or basting.

The stitch width dial controls the side-to-side deviation of stitches‚ primarily affecting zigzag and decorative stitches. Increasing the width creates broader stitches‚ useful for securing edges or creating bolder designs. Always test adjustments on scrap fabric to ensure the desired outcome before sewing your project.
Refer to the manual for recommended settings based on fabric type and stitch selection. Proper adjustment of stitch length and width is crucial for achieving strong‚ professional-looking seams.
Using the Built-In Needle Threader
The Singer 4423 features a convenient built-in needle threader‚ simplifying a potentially frustrating task. Begin by ensuring the presser foot is raised‚ as this activates the threader mechanism. Place the thread onto the hook of the thread guide‚ then gently lower the thread into the needle eye.
Next‚ push down on the lever located on the side of the machine. This action draws the thread through the needle eye. Carefully pull the thread through‚ ensuring it’s fully seated. This feature significantly reduces eye strain and saves time‚ especially for those with limited dexterity.
Consult the manual’s diagrams for a visual guide. If the thread doesn’t pass through‚ re-check thread placement and ensure the presser foot is fully raised.
Maintenance and Troubleshooting
Regular cleaning and oiling are crucial for optimal performance. Address common issues like thread breakage or skipped stitches with the manual’s guidance.
Cleaning and Oiling Procedures
Maintaining your Singer 4423 involves regular cleaning to remove lint and debris from the bobbin area and feed dogs. Power off and unplug the machine before starting. Use a soft brush‚ or the brush included with your accessories‚ to gently remove lint. A small vacuum cleaner attachment can also be helpful.
Oiling is essential for smooth operation. Apply a few drops of Singer oil to the oiling points indicated in the manual – typically the bobbin case‚ presser bar‚ and motor. Avoid over-oiling‚ as this can attract lint. Wipe away any excess oil with a clean cloth. Consistent cleaning and oiling will prolong the life of your machine and ensure consistent stitch quality. Always refer to the official Singer 4423 manual for specific instructions and diagrams.
Troubleshooting Common Issues (Thread Breakage‚ Skipped Stitches)
Thread breakage can occur due to incorrect threading‚ improper tension‚ or a dull needle. Re-thread the machine‚ ensuring the thread is properly seated in all guides. Adjust the thread tension – tighter for heavier threads‚ looser for lighter ones. Always use quality thread.
Skipped stitches often result from a bent or dull needle‚ incorrect needle size for the fabric‚ or improper timing. Replace the needle with a new one of the correct type and size. Ensure the needle is fully inserted. Consult the Singer 4423 manual for recommended needle types for different fabrics. If issues persist‚ professional servicing may be required. Proper maintenance prevents these common problems.
Replacing the Needle
Replacing the needle on your Singer 4423 is a simple process‚ crucial for maintaining optimal sewing performance. First‚ ensure the machine is powered off. Loosen the needle clamp screw using the screwdriver included with your machine. Gently pull the old needle upwards and discard it safely – needles are sharp!
Insert a new needle‚ with the flat side facing the back of the machine. Push it up as far as it will go‚ then tighten the needle clamp screw securely. Always use the correct needle type (size and system) recommended in your Singer 4423 manual for the fabric you are sewing. A dull or incorrect needle can cause skipped stitches or fabric damage.
Belt Replacement Guide
Replacing the belt on your Singer 4423 requires careful attention‚ but is manageable with the right steps. Begin by disconnecting the power supply. Remove the bobbin case and any attached accessories. Access the belt cover by unscrewing it – typically located on the side of the machine. Carefully remove the old‚ broken belt.
Loop the new belt around the motor pulley and the handwheel‚ ensuring a snug fit. Reattach the belt cover and secure it with the screws. Double-check the belt’s alignment before reconnecting the power. A properly installed belt ensures smooth‚ efficient operation of your sewing machine. Refer to your Singer 4423 manual for detailed diagrams.

Advanced Techniques & Accessories
Explore specialized techniques using included feet and heavy-duty thread. Understanding thread types maximizes the Singer 4423’s capabilities for diverse projects and fabrics.
Working with Heavy Duty Fabrics
The Singer 4423 excels at handling thicker materials like denim‚ canvas‚ and upholstery fabrics. Utilizing the machine’s extra power – 50% more than standard models – is crucial for optimal performance. Employing heavy-duty thread‚ specifically designed for robust applications‚ is highly recommended.
Adjusting stitch length to a slightly longer setting can aid in penetrating dense layers. Consider using a denim needle (size 16 or 18) for improved fabric feed and reduced needle breakage. Slow and steady operation is key; avoid rushing the sewing process.
Test on scrap fabric first to determine the ideal settings for your specific material. Proper needle and thread selection‚ combined with controlled speed‚ will ensure successful and durable results when working with heavy-duty fabrics on your Singer 4423.
Utilizing Included Accessory Feet
The Singer 4423 comes equipped with a variety of presser feet to expand its capabilities. The standard presser foot is suitable for general sewing‚ while the zipper foot simplifies installing zippers with precision. An all-purpose foot is included for versatile applications.
Explore the buttonhole foot for creating consistent buttonholes‚ and the button sewing foot for efficiently attaching buttons. The hemmer foot assists in creating professional-looking rolled hems. Utilizing these feet unlocks specialized sewing techniques.
Refer to the manual for detailed instructions on attaching and using each foot. Experiment with different feet to discover their unique benefits. Proper foot selection enhances stitch quality and simplifies complex projects‚ maximizing the potential of your Singer 4423.
Understanding Thread Types for the 4423
The Singer 4423 excels with various thread types‚ but selecting the right one is crucial. While most threads are medium size‚ consider the fabric weight and project demands. For heavy-duty fabrics like denim or canvas‚ utilize heavy-duty thread or even carpet thread for increased strength and durability.
Polyester thread is a versatile all-purpose option‚ offering good strength and minimal stretch. Cotton thread is ideal for natural fabrics‚ providing a softer finish. Nylon thread is excellent for stretch fabrics and lingerie projects.
Always test thread compatibility with your fabric before starting a project. Refer to the manual for recommended thread weights and types. Using the correct thread ensures optimal stitch formation and longevity of your creations with the Singer 4423.
Safety Precautions and Guidelines
Prioritize safety when operating the Singer 4423. Always read all instructions thoroughly before use to understand potential hazards. Keep fingers away from moving parts‚ like the needle and presser foot‚ to prevent injuries.
Never operate the machine with a damaged cord or plug. Ensure the machine is unplugged during maintenance‚ such as changing the needle or belt. Avoid using the machine in damp environments.
Supervise children closely when the machine is in use. Do not attempt to repair the machine yourself; contact authorized service personnel for assistance. Always disconnect the power supply before cleaning or oiling. Following these guidelines ensures a safe and enjoyable sewing experience.

Manual Download and Resources
Find the official PDF manual online‚ alongside support forums and communities. Singer provides customer support contact information for assistance with your 4423.
Finding the Official PDF Manual
Locating the official Singer 4423 Heavy Duty Sewing Machine PDF manual is crucial for comprehensive guidance. Several online resources offer direct downloads. A readily available option is through various websites archiving instruction manuals‚ often accessible with a simple search for “Singer 4423 Manual PDF”.
Argos‚ a retailer of the machine‚ also provides a downloadable PDF version of the instruction manual on their website for the grey model (460/2394). Furthermore‚ exploring Singer’s official website is recommended‚ though navigation can sometimes be complex. Ensure the downloaded manual corresponds to your machine’s specific model number (4423) to guarantee accuracy and relevant information regarding features and safety guidelines.
Always prioritize official sources to avoid outdated or inaccurate instructions.
Online Support Forums and Communities
Engaging with online support forums and communities dedicated to the Singer 4423 can be incredibly beneficial. These platforms offer a space to connect with fellow users‚ share experiences‚ and troubleshoot issues collaboratively. Many sewing enthusiasts actively participate‚ providing solutions to common problems and offering advice on advanced techniques.
Searching online for “Singer 4423 forum” or “Singer Heavy Duty sewing machine help” will reveal numerous active communities. These forums often contain detailed discussions‚ user-submitted tips‚ and even video tutorials;
Beyond dedicated forums‚ general sewing communities and social media groups can also provide valuable support. Remember to clearly state your issue and provide relevant details when seeking assistance from these online resources.
Singer Customer Support Contact Information
For direct assistance with your Singer 4423‚ contacting Singer’s customer support is a reliable option. While specific contact details may vary‚ generally‚ you can reach them through their official website. Look for a “Contact Us” or “Support” section‚ often providing options for phone‚ email‚ or live chat.
Singer’s website typically offers a comprehensive FAQ section and troubleshooting guides‚ potentially resolving your issue without direct contact. If you require personalized support‚ be prepared to provide your machine’s model number (4423) and a detailed description of the problem.
Keep your proof of purchase handy‚ as it may be requested during the support process. You can also find information regarding warranty claims and authorized service centers through their website.
Noise Level and Operating Conditions
The Singer 4423 operates with a typical noise level of 75 decibels (dB) under normal working conditions. This level is comparable to a standard household vacuum cleaner‚ so it’s important to consider the surrounding environment during extended use.
Optimal operating conditions involve a stable‚ level surface to minimize vibration and ensure smooth stitching. Avoid using the machine in excessively humid or dusty environments‚ as these can affect its performance and longevity.
Regular maintenance‚ including cleaning and oiling‚ contributes to quieter operation and prevents malfunctions. If unusual noises develop‚ immediately stop the machine and consult the troubleshooting section of this manual.