Discover the essential guide for operating and maintaining your vintage Singer sewing machine. Access free downloadable manuals online, ensuring proper usage and care for optimal performance.
Overview of the Instruction Manual for Old Singer Sewing Machines

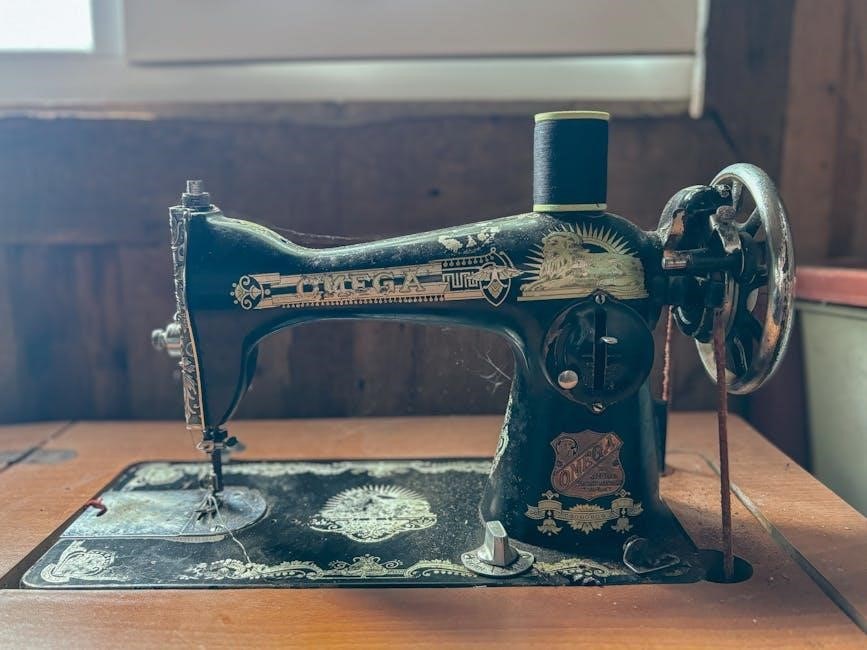
The instruction manual for old Singer sewing machines is a comprehensive guide designed to help users understand and operate their vintage equipment effectively. It typically includes detailed diagrams, step-by-step instructions for threading, troubleshooting common issues, and maintenance tips. Many manuals are now available as free PDF downloads online, covering models like the Singer 201-2, 7 CLASS, and 10 STITCH. These resources are invaluable for preserving the functionality and longevity of classic Singer machines, ensuring they remain functional for generations.
Importance of Using the Correct Manual for Your Machine
Using the correct manual for your old Singer sewing machine is crucial for proper operation, maintenance, and troubleshooting. It ensures compatibility with specific models, providing accurate instructions tailored to your machine’s unique features. Incorrect manuals may lead to improper setup, damaging the machine or causing safety hazards. Always download manuals from trusted sources like Singer’s official website or reputable archives to guarantee reliability and preserve your machine’s functionality and longevity.
Parts Identification
Identify your old Singer sewing machine’s components, including the motor, bobbin case, and stitch regulators. Refer to diagrams for precise part recognition and maintenance guidance.
Understanding the Basic Components of Your Old Singer Sewing Machine
Your old Singer sewing machine consists of key components like the motor, bobbin case, stitch regulators, and tension discs. These parts work together to ensure smooth stitching and proper thread flow. Familiarize yourself with the machine’s layout to identify essential elements like the needle bar, take-up lever, and feed dogs; Understanding these components will help you troubleshoot issues and perform routine maintenance effectively. Always cross-reference with your manual for accurate identification and care instructions.

Additional Features and Attachments
Old Singer sewing machines often come with attachments like buttonhole makers, rufflers, and zipper feet, enhancing their versatility. These accessories expand stitching capabilities, allowing for specialized tasks. Explore your machine’s potential by reviewing the manual for compatible attachments. Many models also feature adjustable stitch lengths and widths, enabling customization for various fabrics. Familiarize yourself with these extras to unlock your machine’s full creative potential and improve your sewing projects’ quality.
Parts List and Diagrams
Your manual includes a detailed parts list and diagrams to help identify every component of your old Singer sewing machine. These visuals simplify maintenance, repairs, and replacements. From bobbins and needles to presser feet and tension discs, each part is cataloged for easy reference. Use these diagrams to locate and understand the function of each piece, ensuring proper assembly and operation. Regularly consult the parts list to verify compatibility when sourcing replacements, keeping your machine in optimal working condition.

Threading and Basic Operation
Master the step-by-step guide to threading your old Singer sewing machine and winding the bobbin correctly. Ensure smooth stitching by following proper tension and operation techniques.
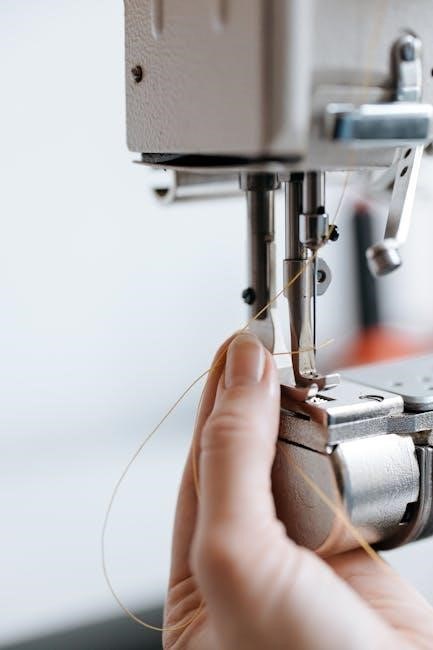
Step-by-Step Guide to Threading Your Old Singer Sewing Machine
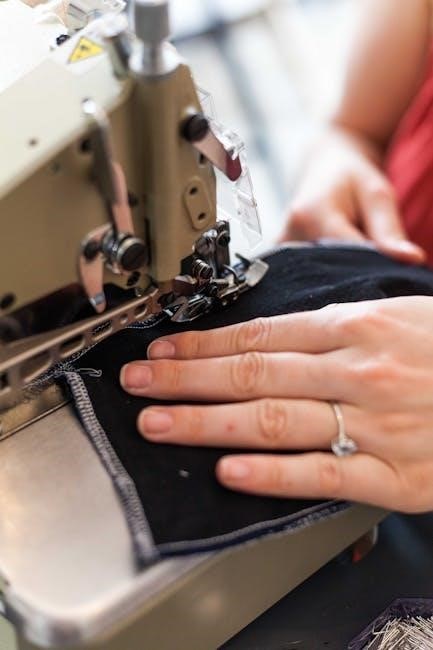
Proper threading is essential for smooth operation. Start by turning the handwheel to raise the take-up lever. Insert the thread through the tension disc, ensuring it’s seated correctly. Guide the thread through the channel, then loop it around the take-up lever from right to left. Pass it through the needle bar groove and finally through the needle eye. Gently pull the thread to remove slack. Refer to model-specific manuals, like the Singer 201-2, for precise instructions. Always use the correct needle and thread type for your machine. For detailed visuals, consult resources on archive.org or Singer’s official website. Proper threading ensures even stitch formation and prevents jams. If unsure, follow online tutorials or seek guidance from sewing communities. Regularly check and adjust thread tension for optimal performance. Threading correctly is the foundation of successful sewing with your vintage Singer machine.
Preparing the Machine for Sewing
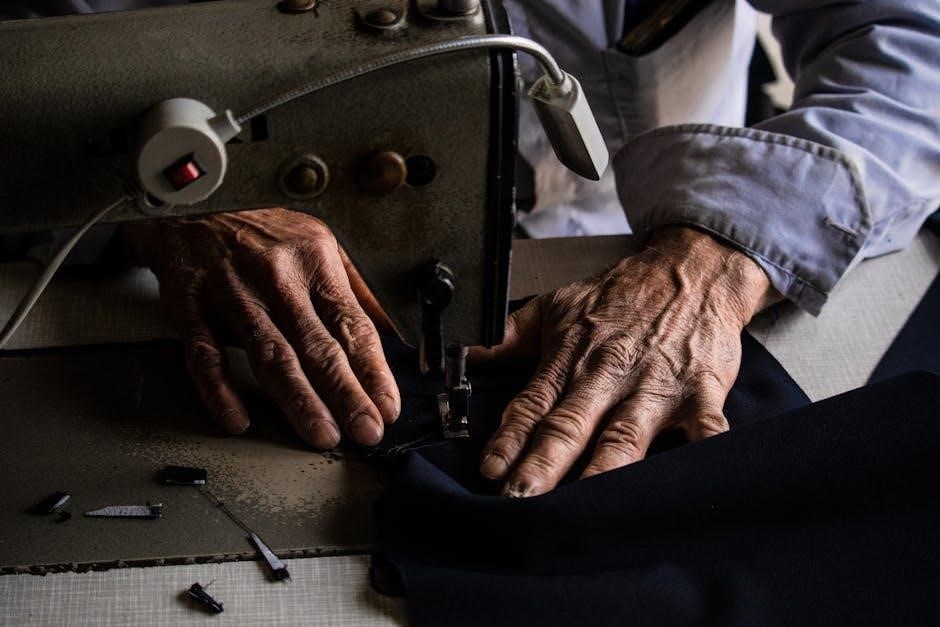
Before sewing, ensure the machine is clean and lubricated. Turn it off and raise the presser foot. Check that the needle is correctly aligned and secure. Insert a properly wound bobbin, ensuring it’s seated correctly in the bobbin case. Thread the machine as per the manual, maintaining the correct tension. Test stitch on scrap fabric to ensure smooth operation. Always use Singer-recommended parts for compatibility. Refer to your specific model’s guide for detailed preparation steps to ensure optimal performance and prevent mechanical issues. Proper preparation enhances sewing efficiency and quality.

Winding and Inserting the Bobbin
Properly wind the bobbin by turning off the machine and placing the thread on the bobbin winder. Guide the thread through the bobbin tension guide, ensuring it’s evenly wound. Cut the excess thread and insert the bobbin into the machine, aligning it with the case. Secure it firmly to ensure smooth stitching. Always refer to your Singer manual for model-specific instructions. Using the correct bobbin size and type is crucial for optimal performance and to avoid thread tension issues during sewing.
Setting Stitch Length and Width

Adjusting the stitch length and width on your old Singer sewing machine is essential for achieving desired results. Use the stitch length dial to set the length, typically ranging from 0 to 5. The lever beneath the stitch length controls the width, allowing adjustments from 0 for a straight stitch to 5 for the widest setting. Refer to your machine’s manual for specific guidance, as settings may vary between models to ensure optimal stitching performance and fabric compatibility.
Maintenance and Care
Regular cleaning and lubrication are crucial for your old Singer sewing machine. Oil moving parts, clean dust, and store properly to ensure longevity and smooth operation.
Regular Cleaning and Lubrication
Regular cleaning and lubrication are vital for maintaining your old Singer sewing machine. Turn off the machine and remove any debris or dust using a soft cloth. Apply a few drops of sewing machine oil to moving parts, such as the bobbin area and handwheel. Avoid over-lubrication, as it can attract dust. Use high-quality oil designed for sewing machines. Clean and oil regularly to prevent rust and ensure smooth operation. Refer to your manual for specific guidance on lubrication points.
Storage and Preservation Tips
Proper storage is crucial for preserving your old Singer sewing machine. Always keep it in a dry, cool place away from direct sunlight and moisture. Use the original case or a sturdy cover to protect it from dust and damage. Apply a thin layer of oil to metal parts before storing to prevent rust. Avoid extreme temperatures and humidity. For long-term storage, ensure the machine is clean and dry. Check periodically to ensure optimal condition and prevent deterioration over time.
Troubleshooting Common Issues
Protect your Singer sewing machine from dust and moisture by storing it in a cool, dry place. Use a sturdy cover or case to maintain its condition and longevity.
Resolving Thread Tension Problems
Thread tension issues are common in old Singer sewing machines. To resolve them, start by checking the top tension discs and ensuring they are properly threaded. Adjust the tension by turning the small dials until the thread flows smoothly. If the bobbin is not seated correctly, remove and reinsert it, ensuring it’s aligned with the machine’s mechanism. Always turn off the machine before making adjustments to avoid any accidental start-ups. Proper tension ensures even stitches and prevents fabric puckering or breaking.
Fixing Bobbin Winding Issues
To resolve bobbin winding issues, ensure the bobbin is properly aligned with the machine’s spindle. Gently hold the thread while winding to prevent tangles. If the bobbin isn’t filling evenly, adjust the bobbin winder tension or replace it if worn. Always use the correct bobbin size and type for your machine. Avoid overfilling, as this can cause jams. If problems persist, consult your manual or seek advice from a sewing expert or repair shop to ensure smooth operation.
Addressing Mechanical Jams
If your machine experiences a mechanical jam, stop sewing immediately and unplug it. Gently remove any fabric or thread caught in the mechanism. Check for debris or lint buildup and clean thoroughly. Use a seam ripper to carefully cut tangled threads. Lubricate moving parts if necessary, following your manual’s guidelines. If the jam persists, consult a professional or refer to troubleshooting guides. Regular maintenance and proper thread handling can help prevent future jams and ensure smooth operation.

Accessing Resources
Access resources for your old Singer sewing machine, including free downloadable manuals and guides from Singer’s official website. Find sewing communities and repair shops for additional support and troubleshooting.
Downloading Free Manuals Online
Access free Singer sewing machine manuals online through official Singer websites or platforms like archive.org. Models such as the Featherweight 221 and Simple 3116 are readily available. These manuals provide detailed instructions for operation, maintenance, and troubleshooting. Additionally, Singer offers downloadable resources, including stitch guides and machine updates, to support your sewing journey. Visit Singer’s official website or authorized dealers to find and download the specific manual for your machine, ensuring you have all the information needed to keep it in optimal condition.
Finding Sewing Communities and Repair Shops
Connect with sewing communities and repair shops for hands-on guidance and support. Local fabric stores and repair shops often offer classes or advice for vintage Singer machines. Online forums and sewing groups provide valuable resources, troubleshooting tips, and shared experiences. Additionally, platforms like eBay and specialized sewing communities offer access to manuals, parts, and expert advice. Reaching out to these networks can help you maintain and repair your machine effectively, ensuring it continues to function optimally for years to come.